Introduction
As we browse the internet, our web browsers keep track of our online activities in the form of a browsing history. This history serves as a valuable resource, allowing us to revisit previously visited websites and quickly access our favorite content. However, there may be times when you want to clear your browsing history google chrome for privacy reasons or to free up space. In this guide, we will walk you through the process of accessing and clearing your history in Google Chrome, empowering you to take control of your internet journey and maintain your privacy. Let’s get started!
Step 1: Launch Google Chrome
Begin by opening the Google Chrome browser on your computer. Look for the Chrome icon on your desktop, taskbar, or in the Start menu, and click on it to launch the browser.
Step 2: Access Chrome History
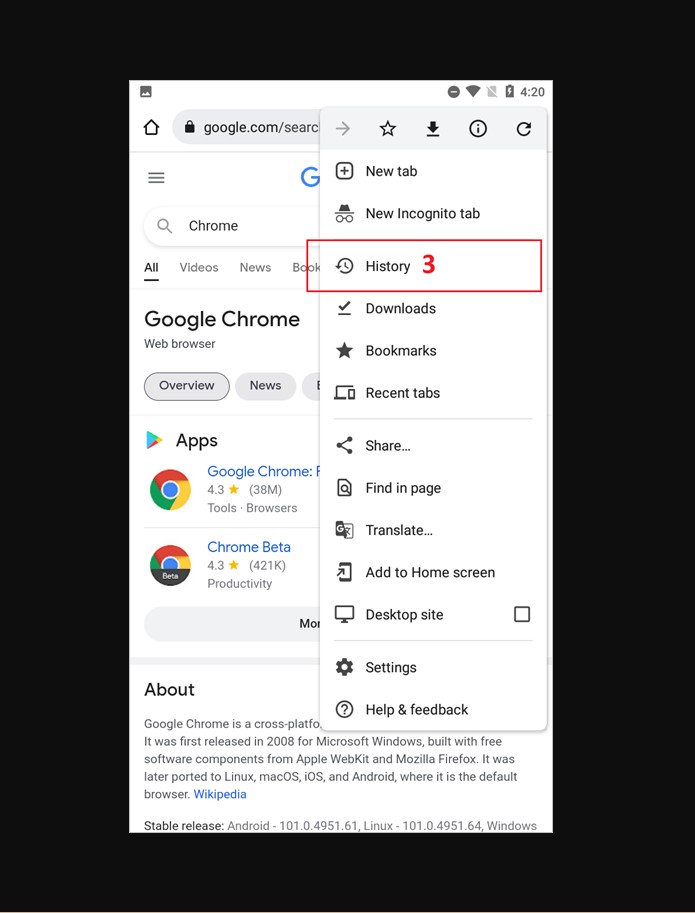
Once Google Chrome is open, locate the three vertical dots in the top-right corner of the browser window. Click on the dots to reveal a dropdown menu. From the menu, select “History.”
Step 3: View Browsing History
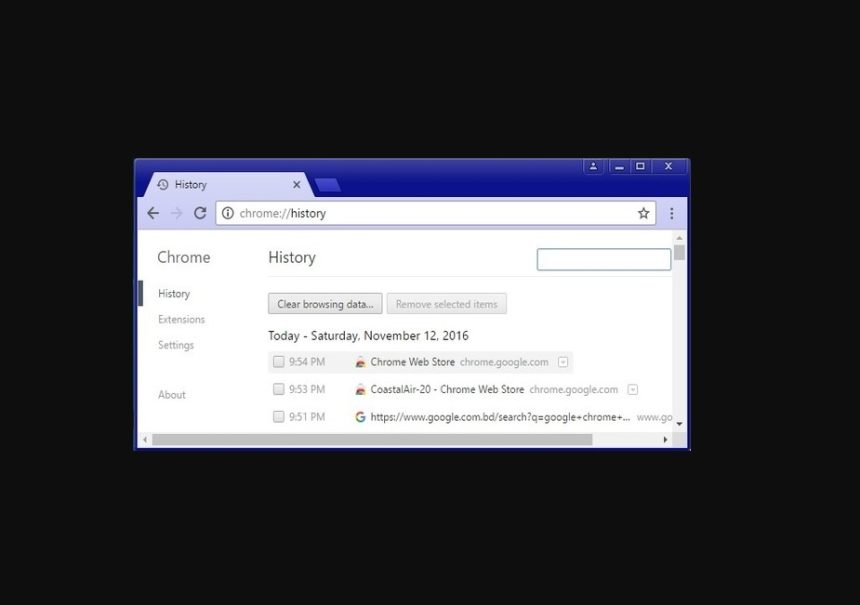
Upon selecting “History,” a new tab will open, displaying your browsing history. Here, you can see a chronological list of websites you have visited. Scroll through the list to explore your internet journey.
Step 4: Search Your History
If you’re looking for a specific website or page within your browsing history, use the search bar at the top of the history page. Simply type in keywords related to the website or page you’re searching for, and Chrome will filter the results accordingly.

Step 5: Clear Browsing History
To clear your browsing history in Google Chrome, locate the “Clear browsing data” option on the left side of the history page. Click on it, and a new window will appear, presenting you with various options.
Step 6: Customize Clearing Options
In the “Clear browsing data” window, you can customize the clearing options based on your preferences. Choose the time range for which you want to clear your history, such as the past hour, day, week, or select “All time” to clear everything. You can also choose to clear other data, such as cached images and files, cookies, and more.
Step 7: Clear Browsing Data
Once you have made your selections, click on the “Clear data” button. Google Chrome will promptly clear the selected browsing data, including your history, based on your preferences.
Conclusion
With this easy-to-follow guide, you can access and clear your browsing history google chrome. Whether you want to maintain your privacy, free up space, or start afresh, clearing your history is a simple and effective solution. By taking charge of your internet journey and managing your browsing history, you can navigate the web with confidence and maintain the privacy you desire. Embrace the power to unveil and control your online footprints by accessing and clearing your history in Google Chrome today!


